EG254S: IoT System Project - IoT Security

Programming the ESP8266 MQTTgateway to use TLS/SSL
The TLS/SSL encryption layer can even be brought to the ESP8266 platform. We shall be using TLS/SSL to secure the ESP8266, which is the MQTT Gateway, so it can be safely accessed over the internet.
The first step towards adding TLS to the ESP8266 framework was to access a secure MQTT Broker. Installation of a TLS MQTT Broker was presented in Activating TLS/SSL option in Mosquitto . After setting up the TLS MQTT broker on the Raspberry Pi host, the next step was to program the ESP8266 IoT platform developed previously to support the secure connection. This required the addition of a new class to the project; WiFiClientSecure. This class supports secure TCP connections.
Before editing the MQTTgateway sketch to use TLS, we need to upload the ca.crt file to the ESP8266 WiFi module.
Arduino ESP8266 filesystem uploader
Arduino plugin which packs sketch data folder into SPIFFS filesystem image, and uploads the image to ESP8266 flash memory. Installation will be done on the ESP8266 MQTTgateway which is the gateway node over the internet as well as connecting to the MQTT Broker.
Installation
From our previous installation of Arduino IDE version 1.8.5 and the ESP8266 package, we are set for the following steps:
Step 1
Download the tool archive from
https://github.com/esp8266/arduino-esp8266fs-plugin/releases/tag/0.3.0
or using the downloaded tool here
Step 2
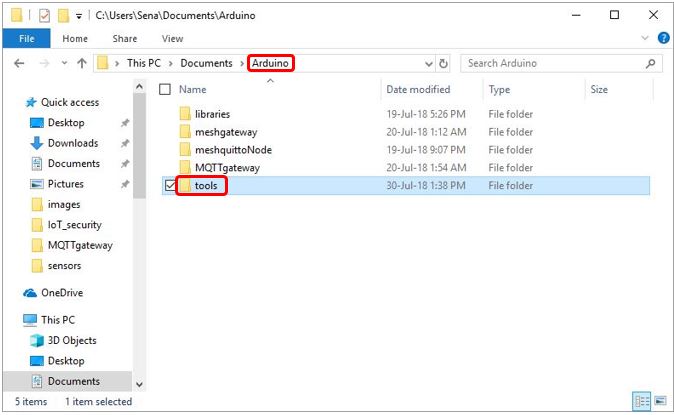
In the Arduino IDE sketchbook directory, create a ‘tools’ directory, if it doesn’t exist yet.
Step 3
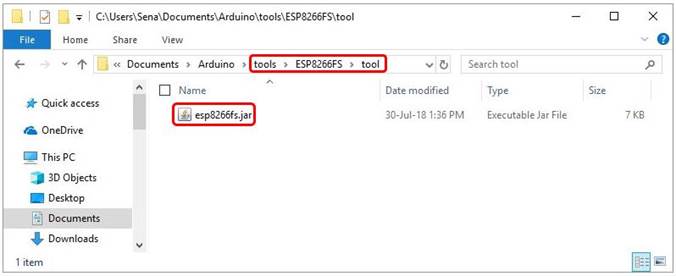
Unzip the downloaded tool from Step 1 into the created ‘tools’ folder from Step 2.
Step 4
Restart the Arduino IDE.
Usage
Since we shall be programming the ESP8266 MQTTgateway node, open the MQTTgateway.ino sketch.
Step 5
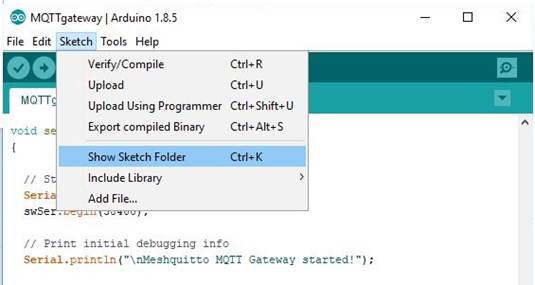
Go to the sketch folder (choose Sketch → Show Sketch Folder).
Step 6
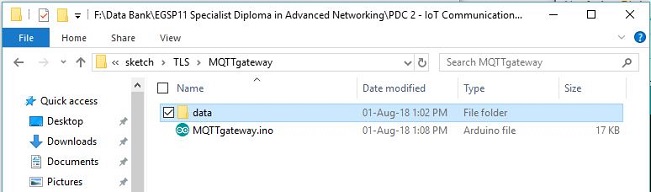
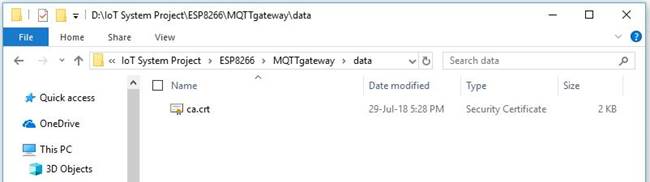
In the sketch folder, create a new folder and name it ‘data’.
Step 7
Copy the ca.crt file, which was created in Configuring TLS/SSL on the Mosquitto Broker, from the Raspberry Pi to the data folder. Any files we want to upload to the ESP8266 are placed in the data folder.
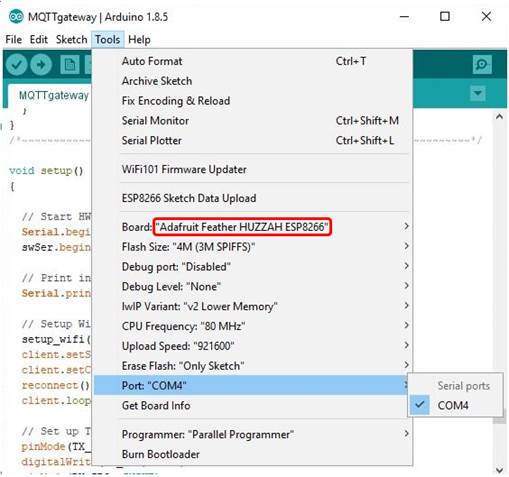
Step 8
Select Adafruit Feather HUZZAH ESP8266 from the Tools → Board: dropdown and the matching COM port for the USB-Serial cable connected to the ESP8266.
Step 9
Select Tools → ESP8266 Sketch Data Upload menu item. This will start uploading the files into ESP8266 flash file system. When done, IDE status bar will display SPIFFS Image Uploaded message. Might take a few minutes for large file system sizes.
Watch the video:
Programming the ESP8266 MQTTgateway to use TLS/SSL
We will edit the Arduino IDE sketch of the ESP8266 MQTTgateway which bridge all the MQTT nodes in the mesh network over the internet to the MQTT Broker.
Firstly, we need to import the filesystem uploader and retreive the ca.crt file for TLS handshake with the MQTT Broker.
#include "FS.h"
// Setup WiFi and MQTT connections
setup_wifi();
delay(1000);
if (!SPIFFS.begin()) {
Serial.println("Failed to mount file system");
return;
}
File ca = SPIFFS.open("/ca.crt", "r"); //the uploaded file ca.crt
if (!ca) {
Serial.println("Failed to open ca file");
}
else
Serial.println("Success to open ca file");
if(espClient.loadCertificate(ca))
Serial.println("loaded");
else
Serial.println("not loaded");
Next, we replace WiFiClient to WiFiClientSecure class and make changes to the PubSubClient arguments.
The final MQTTgateway sketch updated to use TLS:
The full code in plaintext: MQTTgateway.txt
References:
https://github.com/esp8266/arduino-esp8266fs-plugin