ET1530: Project - Week 5 - 7
Setup SFTP Using SSH placed in DMZ
(Adapted from: https://www.digitalocean.com and https://www.sorendam.com)
Instead of using VSFTPD, we use SFTP, which stands for SSH File Transfer Protocol, or Secure File Transfer Protocol to access our web and file server, which is placed in DMZ, for updating and maintaining. It is a separate protocol packaged with SSH that works in a similar way over a secure connection. SFTP is not FTP run over SSH, but rather a new protocol designed from the ground up by the IETF SECSH working group.
How to Connect with SFTP
By default, SFTP uses the SSH protocol to authenticate and establish a secure connection. Because of this, the same authentication methods are available that are present in SSH.
Since we have set up SSH keys for our secure remote logins using SSH, we can connect to our server using the same SSH key we created previously. (Refer to Secure Remote Logins Using SSH in Week 3 – 4.) Then we have completed all of the necessary requirements to use SFTP to manage files. However, there are a few issues required fixing before we can successfully use SFTP.
Different Configuration for SSH and SFTP
Our SSH access is behind a firewall and so we need to connect to the DMZ from the INSIDE before we can access our servers via SSH. However, we need to be able to give users inside our organisation – who don’t have access to connect to our Servers – access to use SFTP. To solve this, we decided to run two instances of SSH with different configuration.
SFTP is a secure way of transferring our files to and from our server. It should work out of the box but we need to change some things to get the right file permissions when updating our website.
1. First step is to make a copy of the contents of the /etc/ssh/ directory. We have chosen to call the copy ssh-sftp throughout this example.
sudo cp -r /etc/ssh /etc/ssh-sftp
Open the sshd_config file from the default folder.
sudo nano /etc/ssh/sshd_config
Change the port to something high that is not on this list of know port search numbers. In our example, we change it to port 23450:
Port 23450
Save the file and reload the SSH service:
sudo service ssh restart
Now, open the sshd_config file from the newly duplicated folder.
sudo nano /etc/ssh-sftp/sshd_config
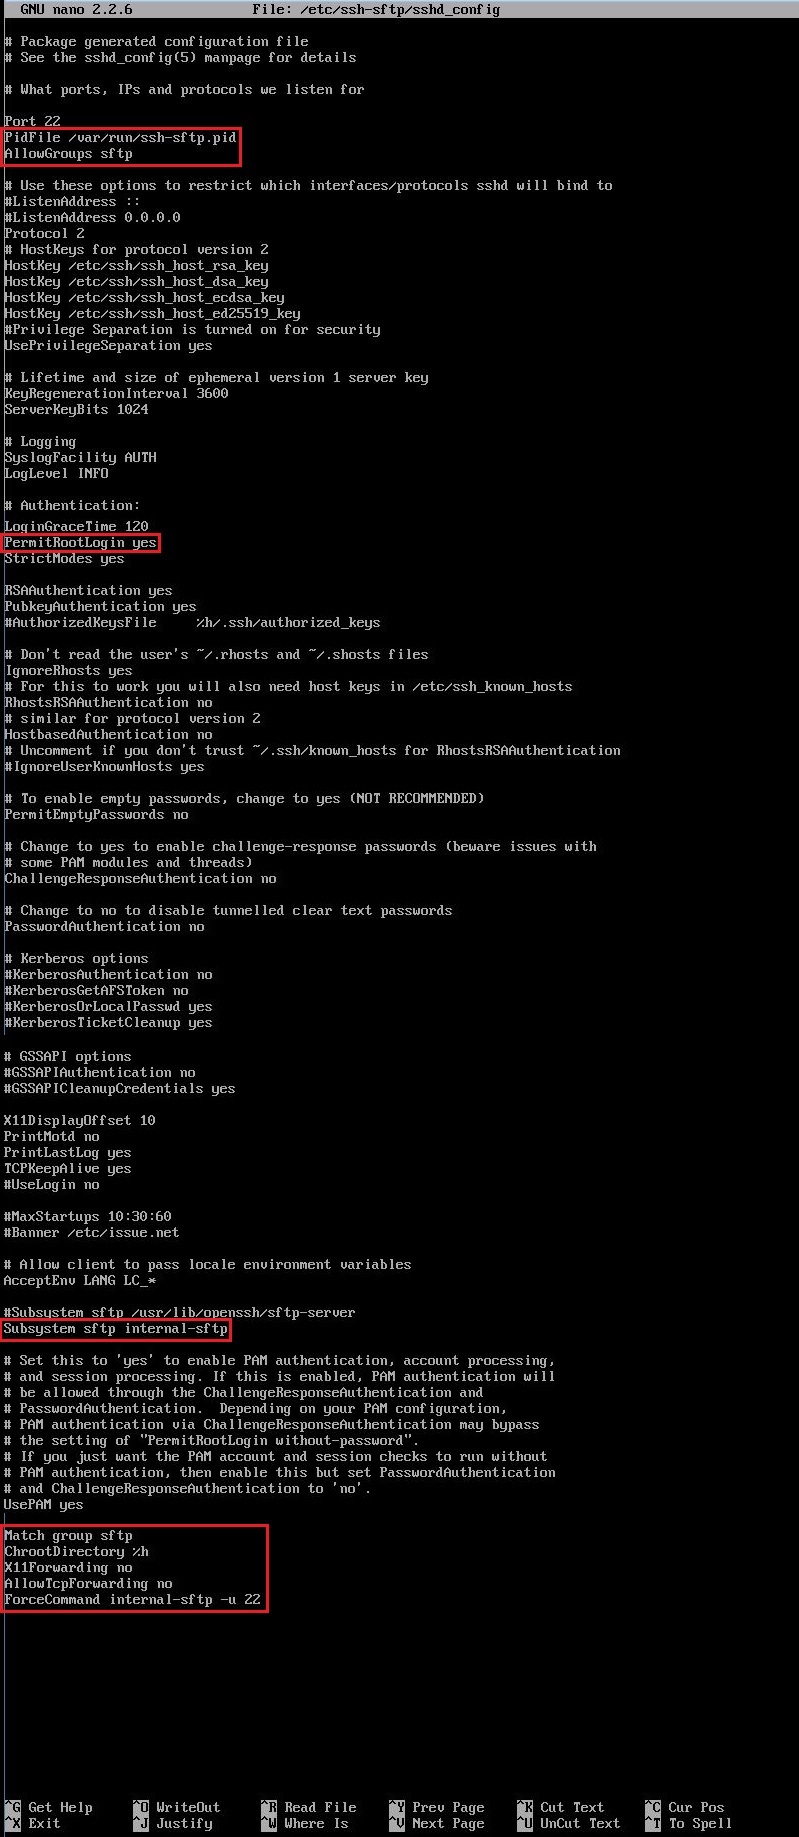
We will need to add a reference to PidFile so the changes in sshd_config looks like this:
PidFile /var/run/ssh-sftp.pid
While we have that file open we also want to allow only the group sftp. This is done by entering the following just below the above:
AllowGroups sftp
…also find the line:
Subsystem sftp /usr/lib/openssh/sftp-server
Change the line so it reads:
Subsystem sftp internal-sftp
Lastly, add the following block to the end of the file (where sftp is the name of the group that restricts the users to SFTP access):
Match group sftp
ChrootDirectory %h
X11Forwarding no
AllowTcpForwarding no
ForceCommand internal-sftp -u 22
Below are the completed changes.
 |
Save the file and reload the SSH service:
sudo service ssh restart
2. Make a copy of the /etc/default/ssh file and name the copy ssh-sftp.
sudo cp /etc/default/ssh /etc/default/ssh-sftp
Open the file…
sudo nano /etc/default/ssh-sftp
…and append ‘-f /etc/ssh-sftp/sshd_config’ to the SSHD_OPTS so the file looks like this:
# Default settings for openssh-server. This file is sourced by /bin/sh from
# /etc/init.d/ssh.
# Options to pass to sshd
SSHD_OPTS='-f /etc/ssh-sftp/sshd_config'
Below are the completed changes. Save the file.

3. Copy the /etc/init/ssh.conf file and name the copy ssh-sftp.conf
sudo cp /etc/init/ssh.conf /etc/init/ssh-sftp.conf
Open the file…
sudo nano /etc/init/ssh-sftp.conf
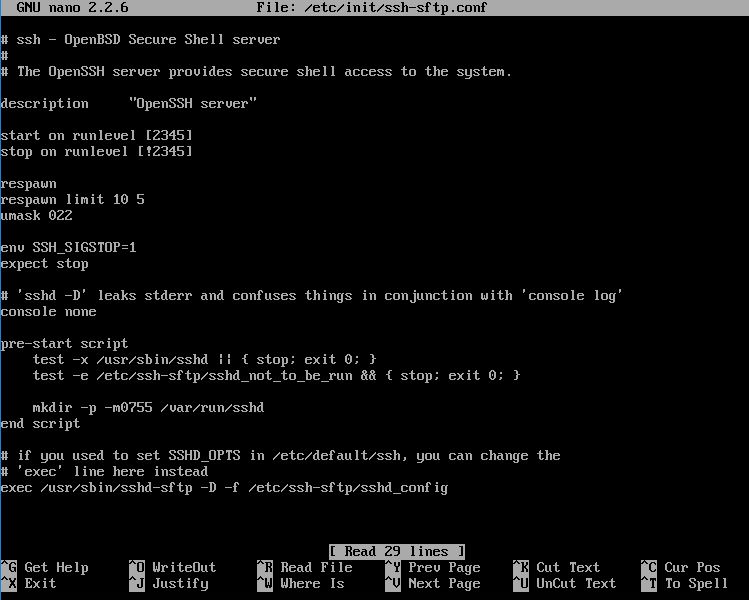
…and change all instances of ssh with ssh-sftp. Furthermore, comment the line that says exec /usr/sbin/sshd -D and replace it with exec /usr/sbin/sshd-sftp -D -f /etc/ssh-sftp/sshd_config so the file looks like this:
#___CODE ABOVE OMITTED___
pre-start script
test -x /usr/sbin/sshd || { stop; exit 0; }
test -e /etc/ssh-sftp/sshd_not_to_be_run && { stop; exit 0; }
mkdir -p -m0755 /var/run/sshd
end script
# if you used to set SSHD_OPTS in /etc/default/ssh, you can change the
# 'exec' line here instead
#exec /usr/sbin/sshd -D
exec /usr/sbin/sshd-sftp -D -f /etc/ssh-sftp/sshd_config
Below are the completed changes. Save the file.
4. Make a symbolic link from /usr/sbin/sshd-sftp to /user/sbin/sshd by executing this command:
sudo ln -s /usr/sbin/sshd /usr/sbin/sshd-sftp
5. Copy the file /etc/init.d/ssh and name it ssh-sftp:
sudo cp /etc/init.d/ssh /etc/init.d/ssh-sftp
Open the file…
sudo nano /etc/init.d/ssh-sftp
…and replace all sshd with sshd-sftp as well as all ssh with ssh-sftp. The file should look somewhat similar to this:
#! /bin/sh
### BEGIN INIT INFO
# Provides: sshd-sftp
# Required-Start: $remote_fs $syslog
# Required-Stop: $remote_fs $syslog
# Default-Start: 2 3 4 5
# Default-Stop:
# Short-Description: OpenBSD Secure Shell server
### END INIT INFO
set -e
# /etc/init.d/ssh-sftp: start and stop the OpenBSD "secure shell(tm)" daemon
test -x /usr/sbin/sshd-sftp || exit 0
( /usr/sbin/sshd-sftp -? 2>&1 | grep -q OpenSSH ) 2>/dev/null || exit 0
umask 022
if test -f /etc/default/ssh-sftp; then
. /etc/default/ssh-sftp
fi
. /lib/lsb/init-functions
if [ -n "$2" ]; then
SSHD_OPTS="$SSHD_OPTS $2"
fi
# Are we running from init?
run_by_init() {
([ "$previous" ] && [ "$runlevel" ]) || [ "$runlevel" = S ]
}
check_for_upstart() {
if init_is_upstart; then
exit $1
fi
}
check_for_no_start() {
# forget it if we're trying to start, and /etc/ssh-sftp/sshd_not_to_be_run exists
if [ -e /etc/ssh-sftp/sshd_not_to_be_run ]; then
if [ "$1" = log_end_msg ]; then
log_end_msg 0 || true
fi
if ! run_by_init; then
log_action_msg "OpenBSD Secure Shell server not in use (/etc/ssh-sftp/sshd_not_to_be_run)" || true
fi
exit 0
fi
}
check_dev_null() {
if [ ! -c /dev/null ]; then
if [ "$1" = log_end_msg ]; then
log_end_msg 1 || true
fi
if ! run_by_init; then
log_action_msg "/dev/null is not a character device!" || true
fi
exit 1
fi
}
check_privsep_dir() {
# Create the PrivSep empty dir if necessary
if [ ! -d /var/run/sshd-sftp ]; then
mkdir /var/run/sshd-sftp
chmod 0755 /var/run/sshd-sftp
fi
}
check_config() {
if [ ! -e /etc/ssh-sftp/sshd_not_to_be_run ]; then
/usr/sbin/sshd-sftp $SSHD_OPTS -t || exit 1
fi
}
export PATH="${PATH:+$PATH:}/usr/sbin:/sbin"
case "$1" in
start)
check_for_upstart 1
check_privsep_dir
check_for_no_start
check_dev_null
log_daemon_msg "Starting OpenBSD Secure Shell server" "sshd-sftp" || true
if start-stop-daemon --start --quiet --oknodo --pidfile /var/run/sshd-sftp.pid --exec /usr/sbin/sshd-sftp -- $SSHD_OPTS; then
log_end_msg 0 || true
else
log_end_msg 1 || true
fi
;;
stop)
check_for_upstart 0
log_daemon_msg "Stopping OpenBSD Secure Shell server" "sshd-sftp" || true
if start-stop-daemon --stop --quiet --oknodo --pidfile /var/run/sshd-sftp.pid; then
log_end_msg 0 || true
else
log_end_msg 1 || true
fi
;;
reload|force-reload)
check_for_upstart 1
check_for_no_start
check_config
log_daemon_msg "Reloading OpenBSD Secure Shell server's configuration" "sshd-sftp" || true
if start-stop-daemon --stop --signal 1 --quiet --oknodo --pidfile /var/run/sshd-sftp.pid --exec /usr/sbin/sshd; then
log_end_msg 0 || true
else
log_end_msg 1 || true
fi
;;
restart)
check_for_upstart 1
check_privsep_dir
check_config
log_daemon_msg "Restarting OpenBSD Secure Shell server" "sshd-sftp" || true
start-stop-daemon --stop --quiet --oknodo --retry 30 --pidfile /var/run/sshd-sftp.pid
check_for_no_start log_end_msg
check_dev_null log_end_msg
if start-stop-daemon --start --quiet --oknodo --pidfile /var/run/sshd-sftp.pid --exec /usr/sbin/sshd-sftp -- $SSHD_OPTS; then
log_end_msg 0 || true
else
log_end_msg 1 || true
fi
;;
try-restart)
check_for_upstart 1
check_privsep_dir
check_config
log_daemon_msg "Restarting OpenBSD Secure Shell server" "sshd-sftp" || true
RET=0
start-stop-daemon --stop --quiet --retry 30 --pidfile /var/run/sshd-sftp.pid || RET="$?"
case $RET in
0)
# old daemon stopped
check_for_no_start log_end_msg
check_dev_null log_end_msg
if start-stop-daemon --start --quiet --oknodo --pidfile /var/run/sshd-sftp.pid --exec /usr/sbin/sshd-sftp -- $SSHD_OPTS; then
log_end_msg 0 || true
else
log_end_msg 1 || true
fi
;;
1)
# daemon not running
log_progress_msg "(not running)" || true
log_end_msg 0 || true
;;
*)
# failed to stop
log_progress_msg "(failed to stop)" || true
log_end_msg 1 || true
;;
esac
;;
status)
check_for_upstart 1
status_of_proc -p /var/run/sshd-sftp.pid /usr/sbin/sshd-sftp sshd-sftp && exit 0 || exit $?
;;
*)
log_action_msg "Usage: /etc/init.d/ssh-sftp {start|stop|reload|force-reload|restart|try-restart|status}" || true
exit 1
esac
exit 0
6. Start the new ssh-sftp service:
sudo service ssh-sftp start
Chroot User and Enable SFTP
If we try to use SSH to access the site we should be denied. That’s good. Now it is time to set up SFTP so it works with remote SSH and gives the files we upload the correct permissions.
After modifying OpenSSH we need to modify our chrooted web user accounts to have the sftp group as a secondary group. But first, we need to add that group:
sudo addgroup --system sftp
Modify the web user accounts to have the sftp group as a secondary group:
sudo usermod -G sftp user
Since, the chroot environment is in a user’s home directory both /var/www and /var/www/vm223 must be owned by root and should have permissions along the lines of 755 or 750.
To change this, execute the following:
sudo chown root:root /var/www/vm223
…and this:
sudo chmod 755 /var/www/vm223
We repeat the above steps for each user. These users will now be unable to create files anywhere in the system but in subfolders to /var/www/username, since these directory are now owned by the root user.
Just to make sure that the correct owner and group is set for the files and folders belonging to the user, run this query:
sudo chown user:user /var/www/vm223/*
This will make sure that the user is able to upload to all folders below /var/www/vm223/ – in our case the folders logs and not least public_html.
We should now all be set and able to upload/download using SFTP.
We might need to reboot our SFTP connection and reconnect to make the right file permission come through.
Note: Since the /etc/sudoers file has been altered to no longer allow users in the admin group to escalate privilege, we need to fix the broken sudo.
Using WinSCP Portable
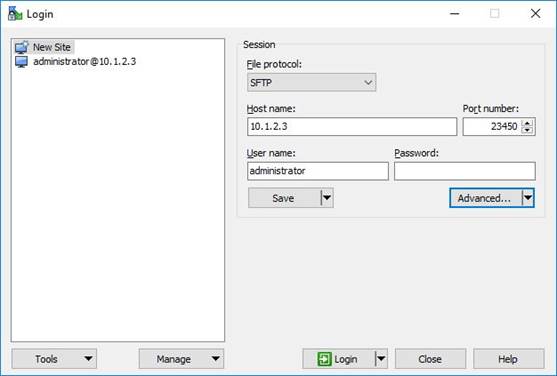
We use the WinSCP Portable (on the client side), select the File protocol: SFTP; and fill the Host name:, Port number:, and User name:
Click on Advanced…and select SSH – Authentication to load the Private key file:
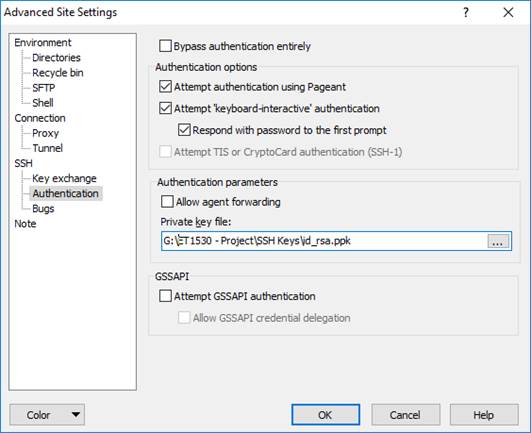
Click OK and follow by Login:

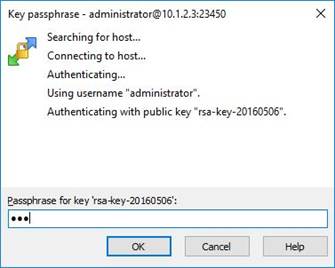
Click Yes and enter the Passphrase for key “rsa-key”:
And we are in:
