EG254S: IoT System Project - Sensors

Connecting Touch Sensor to ESP8266
We are going to connect the Capacitive Touch Sensor to the Adafruit HUZZAH ESP8266. Again, we shall look at the Adafruit Feather HUZZAH ESP8266 choices of GPIO pins available after we had previously connected the Ultrasonic Sensor to it.
Adafruit Feather HUZZAH ESP8266 GPIO pins
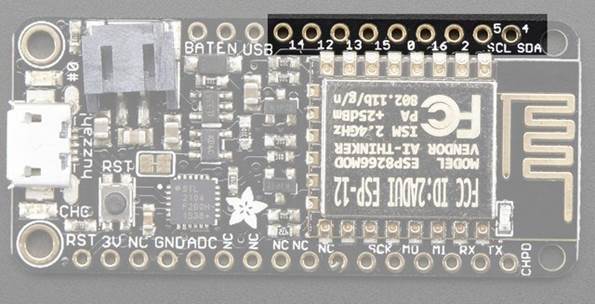
This breakout has 9 GPIO: #0, #2, #4, #5, #12, #13, #14, #15, #16 arranged at the top edge of the Feather PCB.
We shall be using the following pins:
GPIO #0, which does not have an internal pullup, and is also connected a red LED. This pin is used by the ESP8266 to determine when to boot into the bootloader. If the pin is held low during power-up it will start bootloading! That said, you can always use it as an output, and blink the red LED - note the LED is reverse wired so setting the pin LOW will turn the LED on.
GPIO #16 can be used to wake up out of deep-sleep mode, you'll need to connect it to the RESET pin
Note: I’ll be using the GPIO pin 0, which is connected to the onboard red LED, to indicate activity from the touch sensor.
Connections
The connections are really very simple:
|
Grove – Touch Sensor pin |
Adafruit Feather HUZZAH ESP8266 GPIO pin |
|
GND |
GND |
|
VCC |
3V |
|
NC |
Not used |
|
SIG |
16 |
The Grove – Touch Sensor’s NC pin is not connected to any pin and it is left unused.
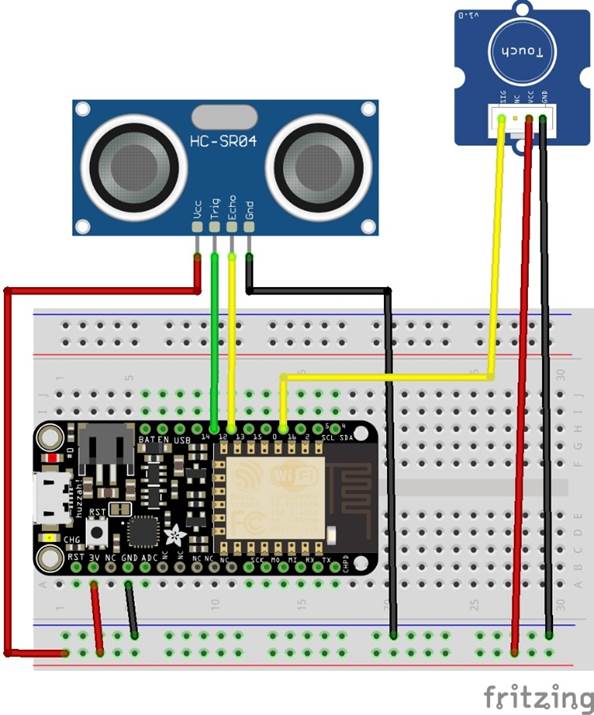
Schematics
Follow the schematic diagram to wire the Grove – Touch Sensor to the Adafruit Feather HUZZAH ESP8266.