ET1530: Project - Week 3 - 4
Create Samba File Server in Ubuntu 14.04
(Adapted from: https://help.ubuntu.com)
One of the most common ways to network Ubuntu and Windows computers is to configure Samba as a File Server. This section covers setting up a Samba server to share files with Windows clients.
The server will be configured to share files with any client on the network without prompting for a password.
Installation
The first step is to install the samba package. From a terminal prompt enter:
sudo apt-get install samba
That's all there is to it; we are now ready to configure Samba to share files.
Configuration
The main Samba configuration file is located in /etc/samba/smb.conf. The default configuration file has a significant amount of comments in order to document various configuration directives.
sudo nano /etc/samba/smb.conf
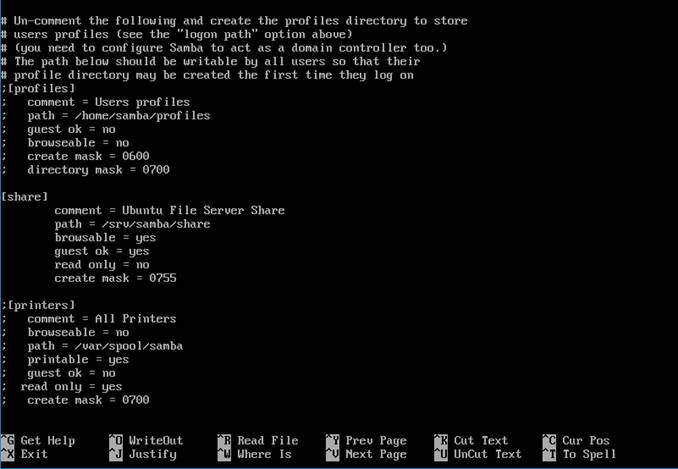
First, ensure that workgroup = WORKGROUP (which is the workgroup name of the client’s PC) in the [global] section of /etc/samba/smb.conf:
Workgroup = WORKGROUP
Create a new section at the bottom of the commented [profiles], for the directory to be shared:

1. comment: a short description of the share. Adjust to fit your needs.
2. path: the path to the directory to share.
This example uses /srv/samba/share name because, according to the Filesystem Hierarchy Standard (FHS), /srv is where site-specific data should be served. Technically Samba shares can be placed anywhere on the filesystem as long as the permissions are correct, but adhering to standards is recommended.
3. browsable: enables Windows clients to browse the shared directory using Windows Explorer.
4. guest ok: allows clients to connect to the share without supplying a password.
5. read only: determines if the share is read only or if write privileges are granted. Write privileges are allowed only when the value is no, as is seen in this example. If the value is yes, then access to the share is read only.
6. create mask: determines the permissions new files will have when created.
Disable out the [printers] section. Since, printers are not installed on Ubuntu server:
Now that Samba is configured, the directory needs to be created and the permissions changed. From a terminal enter:
sudo mkdir -p /srv/samba/share
sudo chown nobody:nogroup /srv/samba/share/
Finally, restart the samba services to enable the new configuration:
sudo service smbd restart
From a Windows client we should now be able to browse to the Ubuntu file server and see the shared directory. In Windows Explorer window, click on network, look for the Ubuntu server (which is USVSY223), double click on it and we will see the share folder. Enter the share folder and we will be able to see the sample file placed in it (which is 01.PNG).
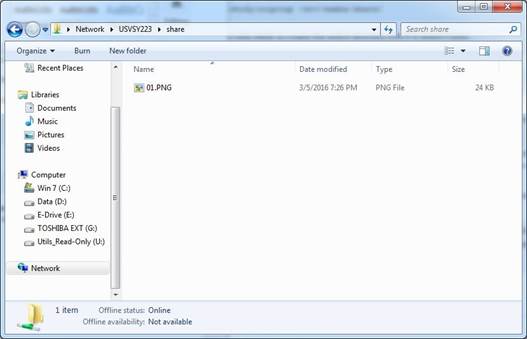
We can also check that the sample file is in Ubuntu server’s share folder:
![]()
Now, we can upload the documents to Ubuntu Server. First, we copy the html files and documents to the share folder in Windows client. Then, in Ubuntu server, from the terminal enter:
sudo cp –R /srv/samba/share/* /var/www/vm223/
Finally, we have uploaded all the files and subdirectories; and the web server is already!