ET1530: Project - Week 1 - 2
How to Create VM Based Linux Server
This guide will describe the basic steps of creating a VM server using Ubuntu Server 14.04 LTS.
More detail about Ubuntu Server 14.04 LTS you can found the full release notes at here .
Step by Step Creating a VM Server using Ubuntu Server 14.04
Step 1. First, Download VMware Player 7.1.3 from VMware official site or click the following link to download the VMware Player:
- Download VMware-player-7.1.3
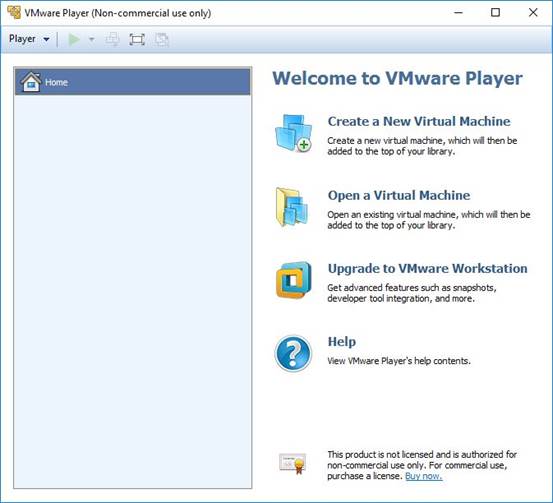
Step 2. After installing VMware Player, open the program.
Click on: Create a New Virtual Machine
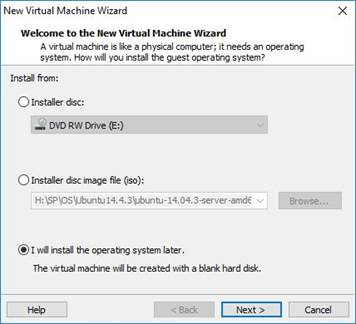
Step 3. Select: I will install the operating system later and click Next
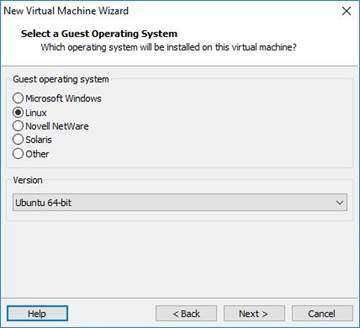
Step 4. Select Linux to be installed on this virtual machine, default Linux, Version Ubuntu 64-bit and click Next
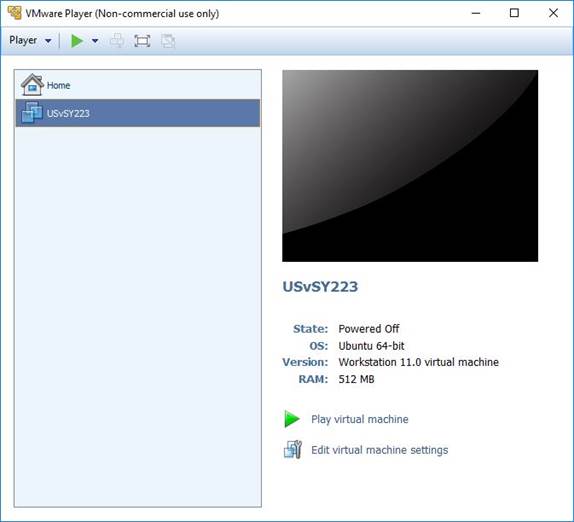
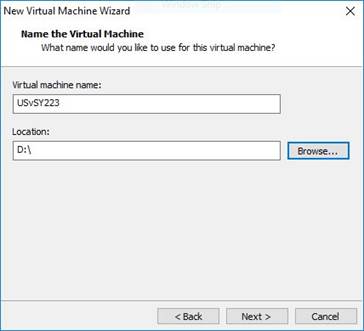
Step 5. Name the Virtual Machine: USvSY223 and indicate the location of the VM files to be saved in. Click Next.
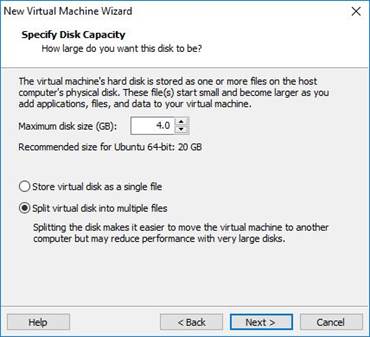
Step 6. Use disk space of 4 GB and Split virtual disk into multiple files. Click Next.
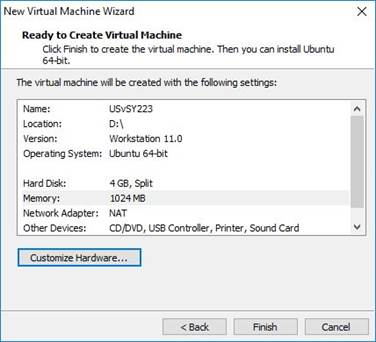
Step 8. Before we click on Finish, we need to Customize Hardware…
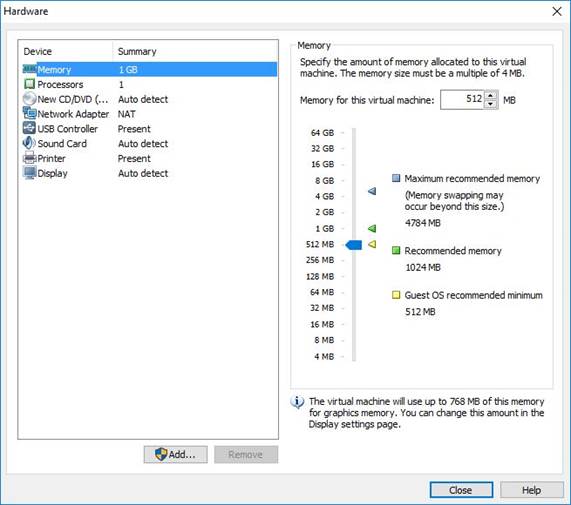
Step 9. We need to set the memory to 512 MB
Step 10. Select Network connection as Bridged: Connected directly to the physical network
Tick on √ Replicate physical network connection state.
Click on Configure Adapters and tick on √ Intel® Ethernet Connection I217-LM – VirtualBox Bridged networking Driver Miniport
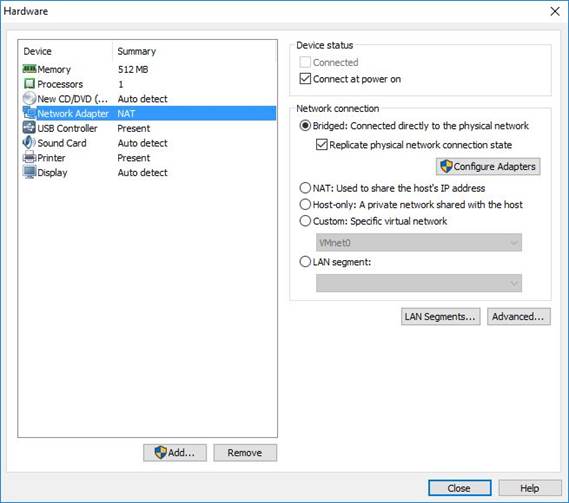
Step 11. Remove USB Controller, Sound Card and Printer from Device by clicking on the Remove button.

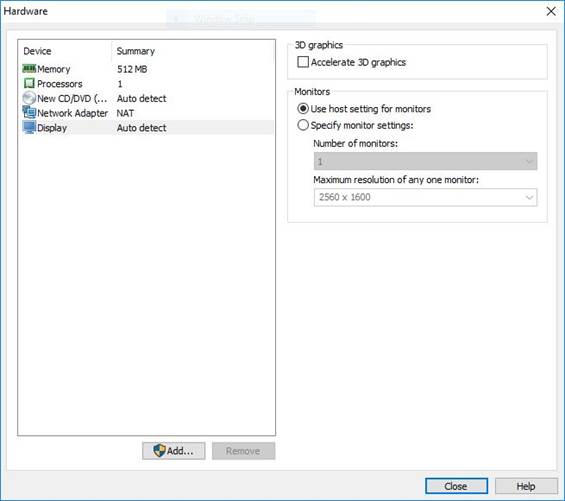
Step 12. Click on Display and untick Accelerate 3D graphics under 3D graphics.
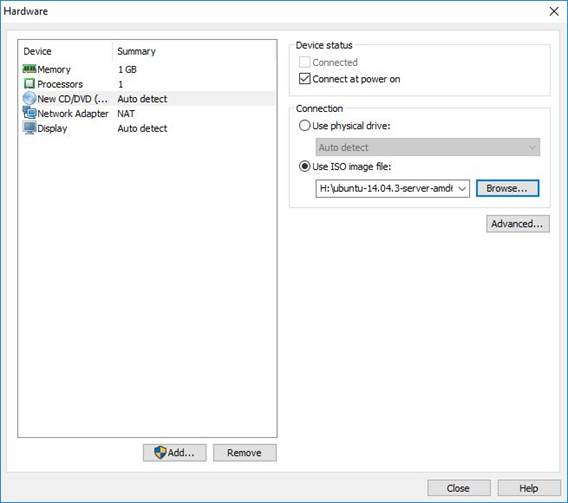
Step 13. Click on New CD/DVD and select Use ISO image file: where we use the file ubuntu-14.04.3-server-amd64.iso to install Ubuntu server.
Step 14. Click Close and Finish button. We are now ready to install Ubuntu server by clicking on ► Play virtual machine
to begin installation of Ubuntu Server 14.04 LTS.