EG254S: IoT System Project - Microcontroller

Adafruit Feather HUZZAH ESP8266
(Adapted from: https://learn.adafruit.com/adafruit-feather-huzzah-esp8266)
Each Feather HUZZAH ESP8266 breakout comes pre-programmed with NodeMCU's Lua interpreter. The Lua interpreter runs on the ESP8266 and you can type in commands and read out the results over serial.
While the Feather HUZZAH ESP8266 comes pre-programmed with NodeMCU's Lua interpreter, you don't have to use it! Instead, you can use the Arduino IDE which may be more familiar. This will write directly to the firmware, erasing the NodeMCU firmware, so if you want to go back to Lua, use the flasher to re-install it.
We shall be using the familiar Arduino IDE to upload our code to the ESP8266.
Using Arduino IDE
Step 1: Install the Arduino IDE
Install the Arduino IDE by downloading it from https://www.arduino.cc/en/Main/Software . The IDE version used for this project is the Arduino 1.8.5 (Windows installer).
Step 2: Install the USB Driver
We also need to install the windows USB driver for the Feather Huzzah ESP8266, which is the SiLabs CP2104 USB Driver: https://www.silabs.com/products/development-tools/software/usb-to-uart-bridge-vcp-drivers . We installed the CP2104 USB Driver which was given to us during the IoT Systems module’s lab session.
Step 3: Connect the ESP8266 to a PC
To upload code to the ESP8266 and use the serial console, connect any data-capable micro USB cable to the Feather HUZZAH and the other side to your computer's USB port.

Step 4: Install the ESP8266 Board Package
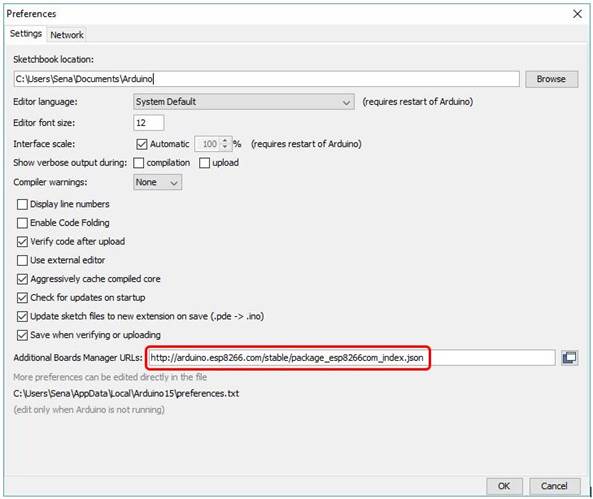
Open the Arduino IDE software. Click on File → Preferences

Enter http://arduino.esp8266.com/stable/package_esp8266com_index.json into Additional Board Manager URLs field in the Arduino IDE preferences:
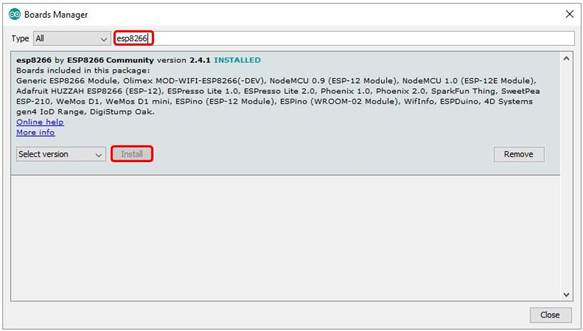
Next, use the Board manager to install the ESP8266 package. Click on Tools → Board: → Boards Manager...

Enter esp8266 in the search box and install the ESP8266 package which is by the “ESP8266 Community”. After the install process, you should see that esp8266 package is marked INSTALLED. Close the Boards Manager window once the install process has completed.
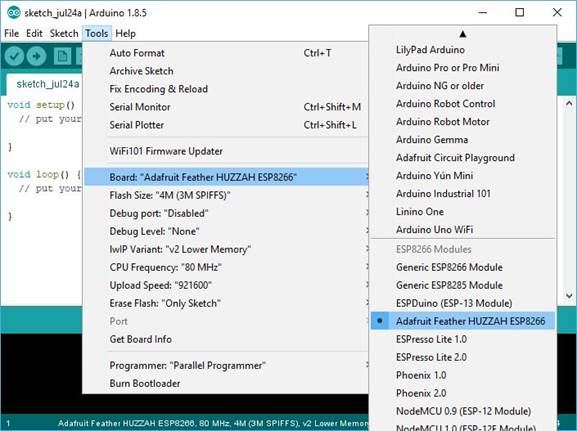
Step 5: Setup ESP8266 Support
When you've restarted the Arduino IDE, select Adafruit Feather HUZZAH ESP8266 from the Tools → Board: dropdown
Select “80 MHz” as the CPU frequency
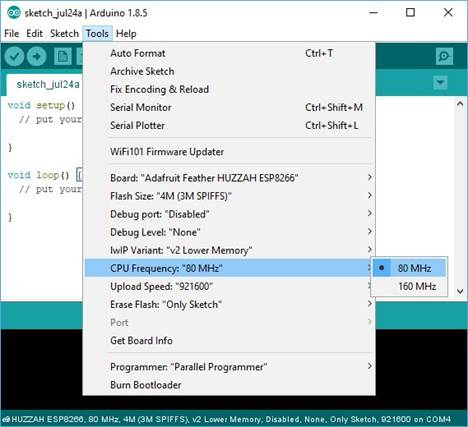
We can keep the Flash Size at "4M (3M SPIFFS)”
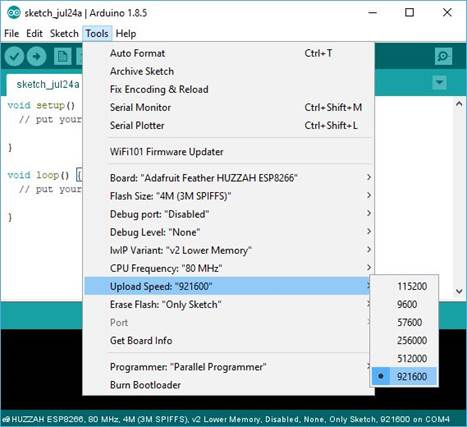
For Upload Speed, select 921600 baud to try the faster baud rates, but sometimes it may fail, and we have to retry (Else, for a slower and sure work baud rate, select 115200 baud)
Remember to select the matching COM port for the USB-Serial cable connected to the ESP8266
